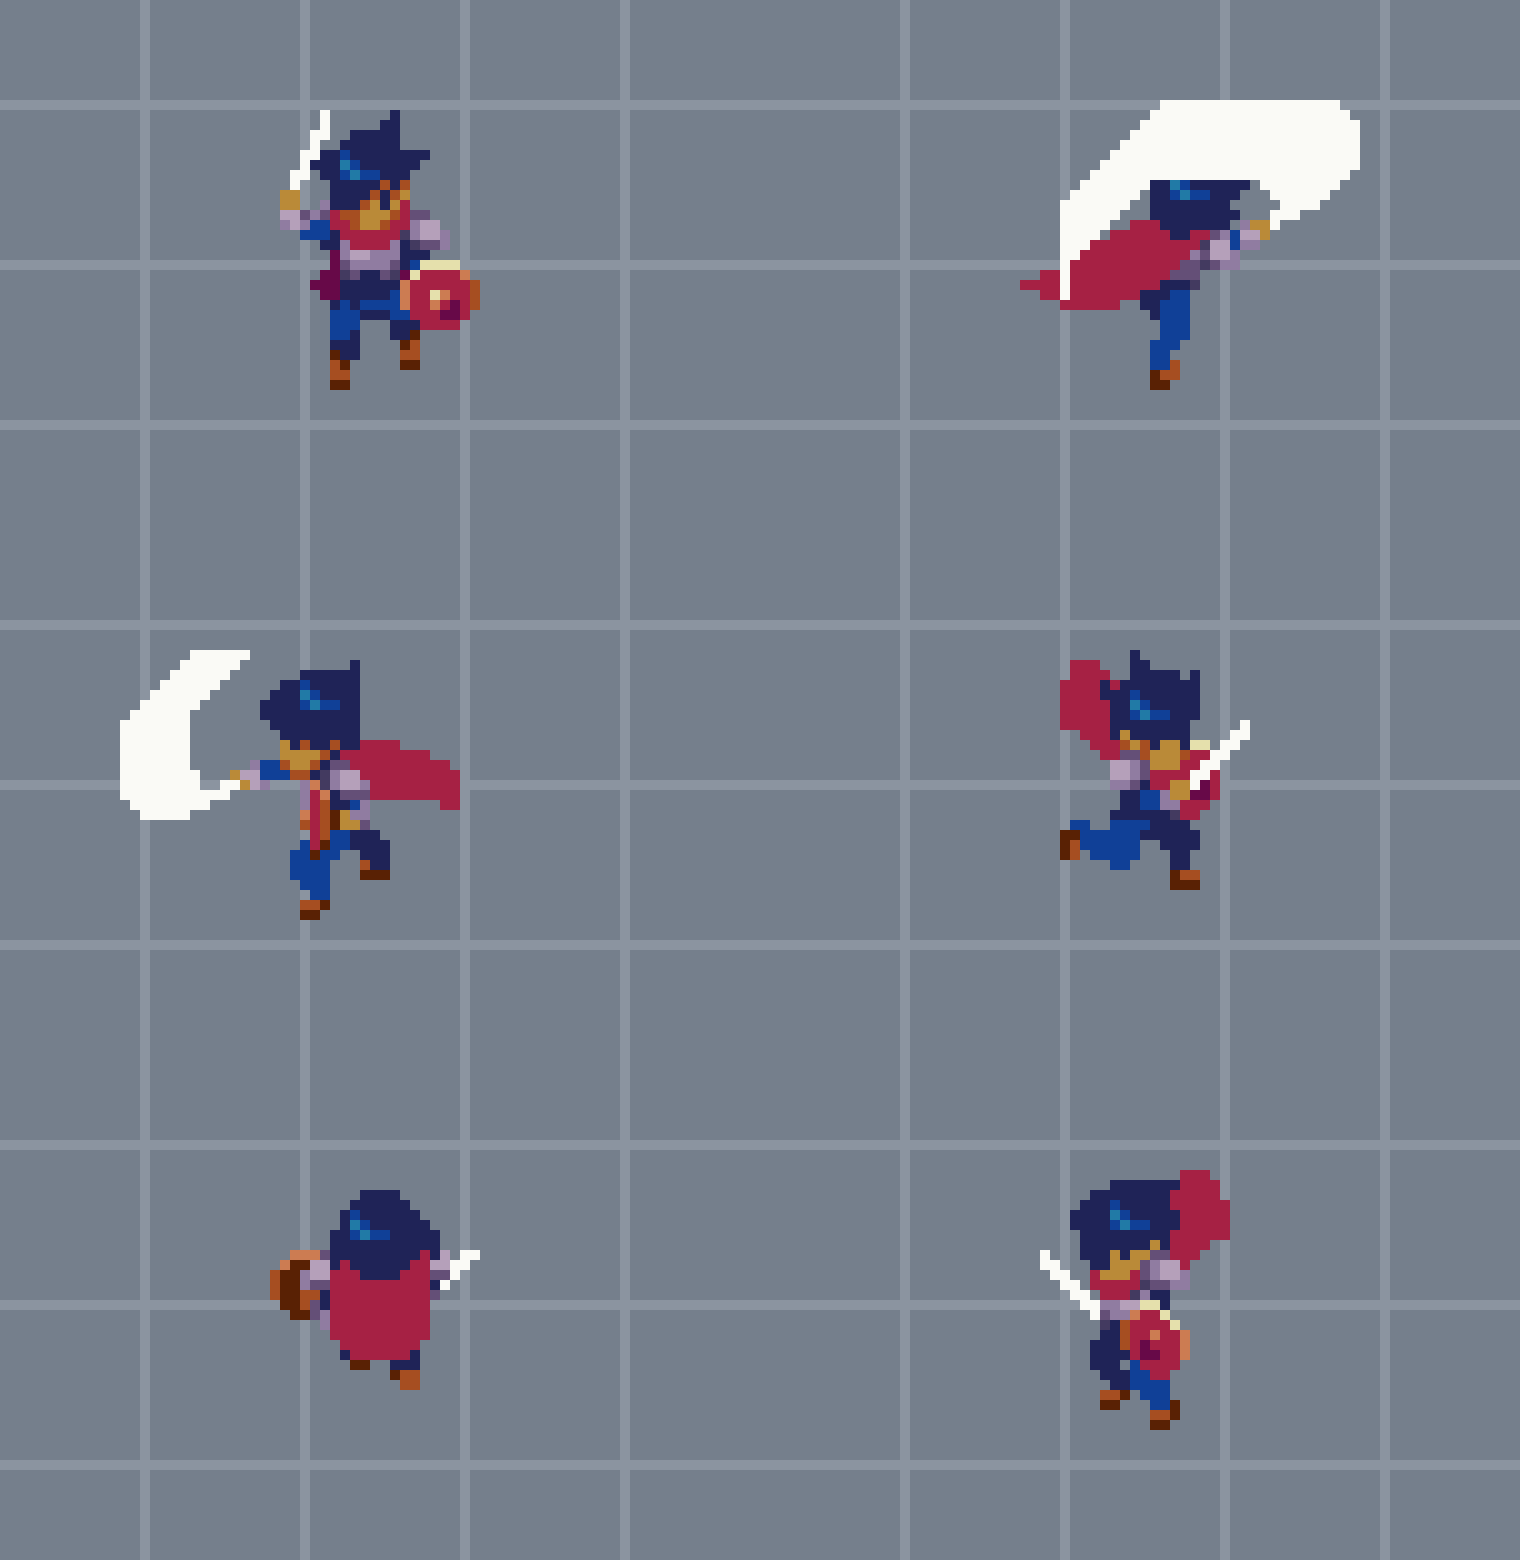
Intro
Welcome to the 3rd installment of an interconnected series of top down character animation studies. In review, the first lesson in Pixelblog 55 introduced the basic anatomy of the character, including idle and run animations for the dummy version of the character. The blue haired character design was also given an idle animation, but no run. The second lesson in Pixelblog 56 expanded the dummy template with weapons based attack animations. Finally, in this 3rd episode, run and attack animations are applied to our blue haired warrior. If you’re just jumping in now, I highly recommend reviewing the simplified dummy versions of the previous lessons before attempting to animate a detailed character design.
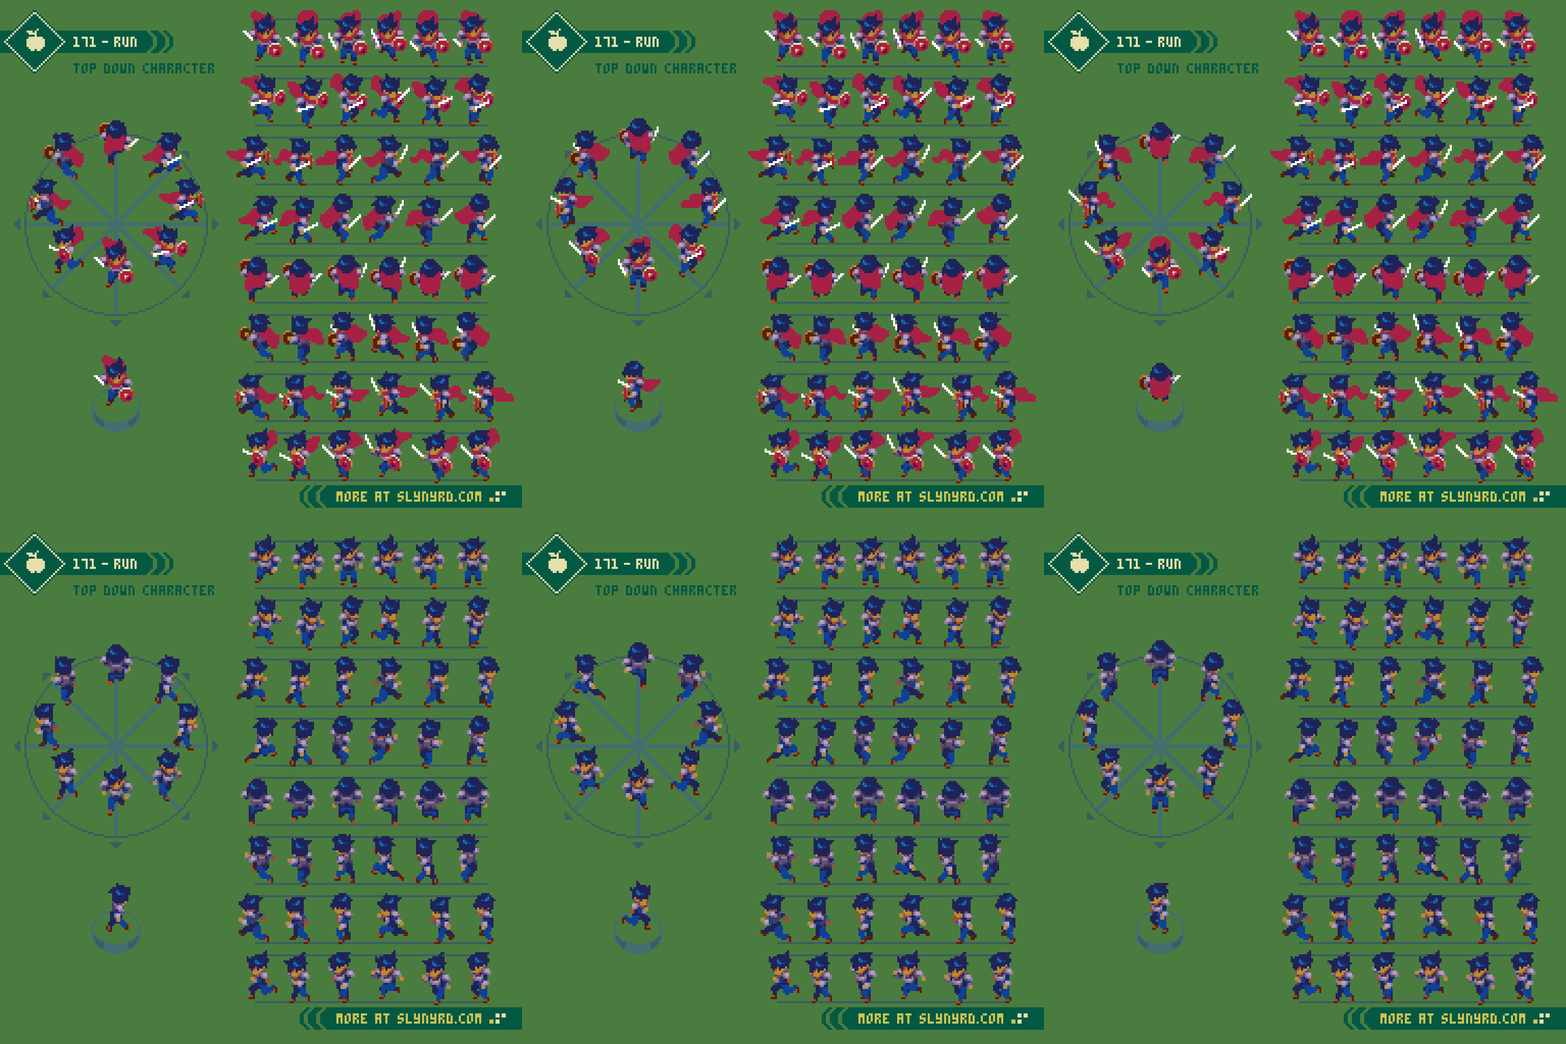
Run
With the animation already established with a dummy template in part 1, this should be a piece of cake… right? Not so much. Every detail of the character design significantly increases the workload for animation. The main challenge is translating every element of the design consistently across all directions, and frames with minimal visual noise. To make things even more laborious, I chose to respect asymmetric details. For example, the sword and shield stay in the proper hands across all orientations, even details of the the hair are respected. Furthermore, If you want to create your own original character using this model, remember that every detail will need to be carried across 36 unique frames of animation, and that’s just for the run.
Not to diminish the utility of the dummy, it provides a shorthand that ensures the quality of the overall animation. Going in raw and working out the movement while dealing with the character details would end up taking more time than it does to first set up a dummy version. Furthermore, the quality of the animation would likely suffer without the clarity of anatomy provided by the dummy version.
First, I started by animating the base character with armor, but without the sword, shield and cape. This allows the option to create different equipment sets on top of the base character. The motion of the base character exactly follows the dummy template, however, when holding the sword and shield I reduced the swing of the arms to give a more natural weighted feel to the equipment.
As with the dummy animation, each frame of the 6 frame cycle plays at 100 milliseconds (0.1 seconds).
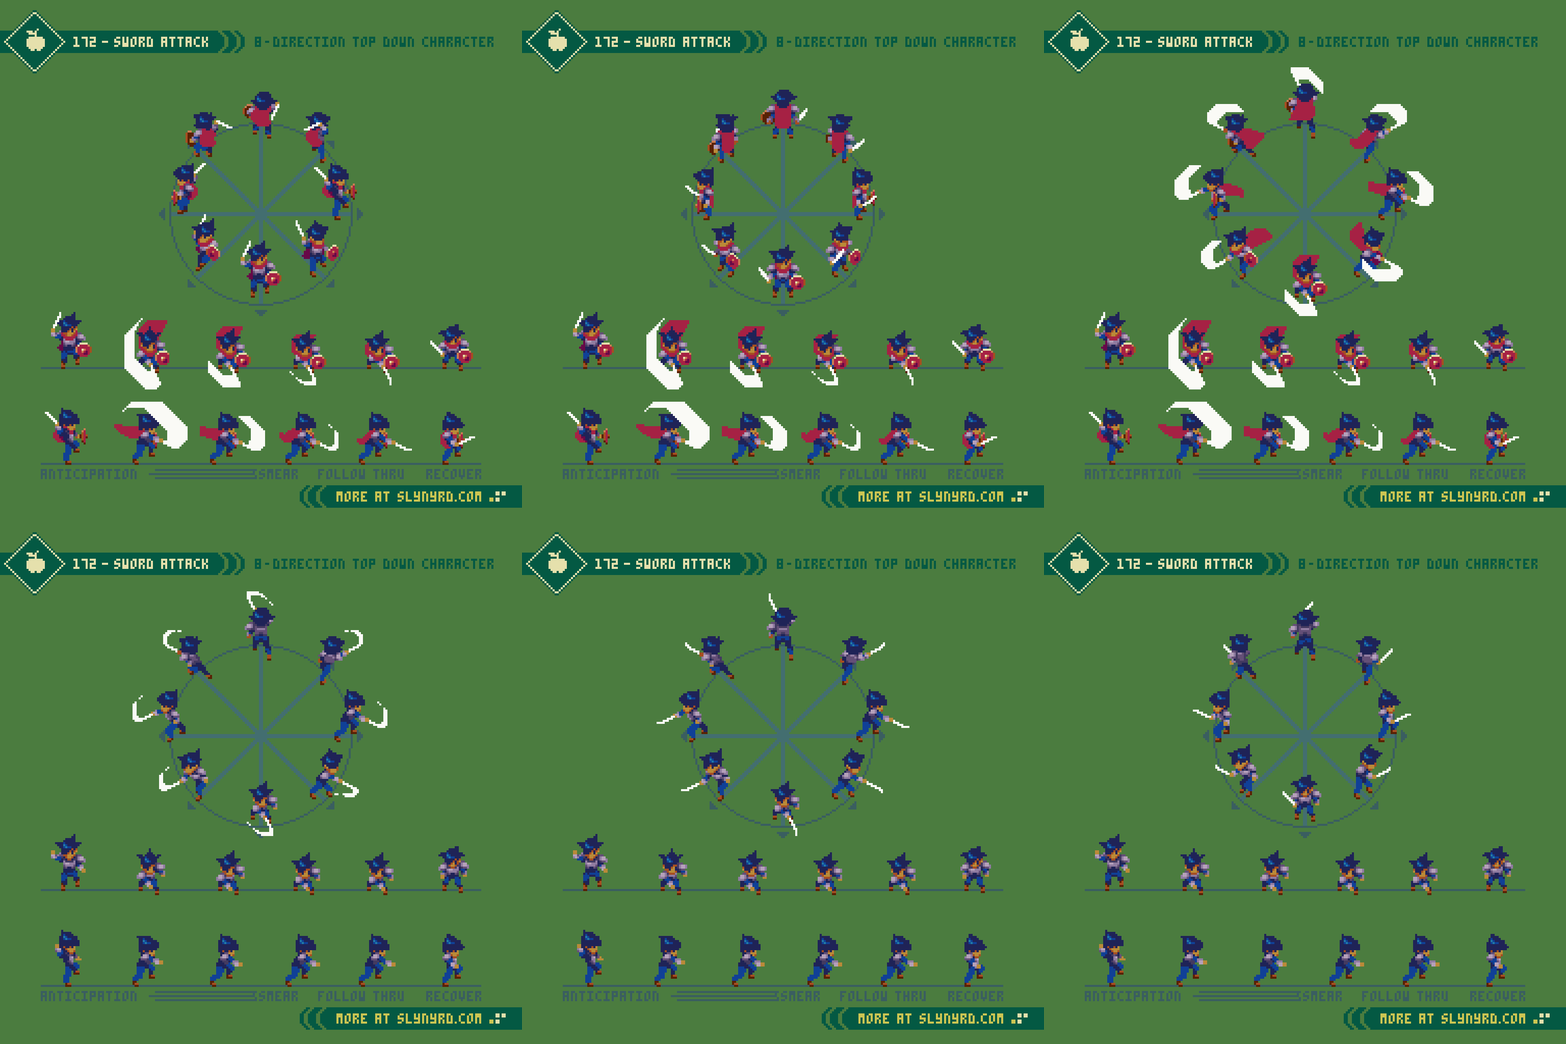
Attack
I took the same approach for the sword attack animation, first animating the base character, then adding the equipment on top. Likewise, the motion of the left hand is modified when holding the shield to imply a natural weight of the equipment.
The sequence also includes the idle animation from part 1. However, I made some minor modifications to a small number of frames to improve clarity and consistency of some details, mostly in the arms.
As with the dummy sword attack animation, the frame timing for the 6 frame cycle goes as follows.
In milliseconds- 100, 50, 50, 50, 100, 50
While I’ve only demonstrated the sword attack, other melee based weapons could be interchanged with slight modification to the posing and frame timing, as can be referenced with examples in Pixelblog 56.
Feeling it out
Much of art could be described as a happy accident, and this is especially so with animation. Furthermore, taking a concept from the mind to a tangible moving product involves trial and error, and trust in the process. No matter how much experience I gain, there’s always a limbo state amid creation, but I’ve learned to embrace it, and find a comfort with the discomfort, so to speak. A comfort that is only gained after consistently coming through the dark to a happy result numerous times.
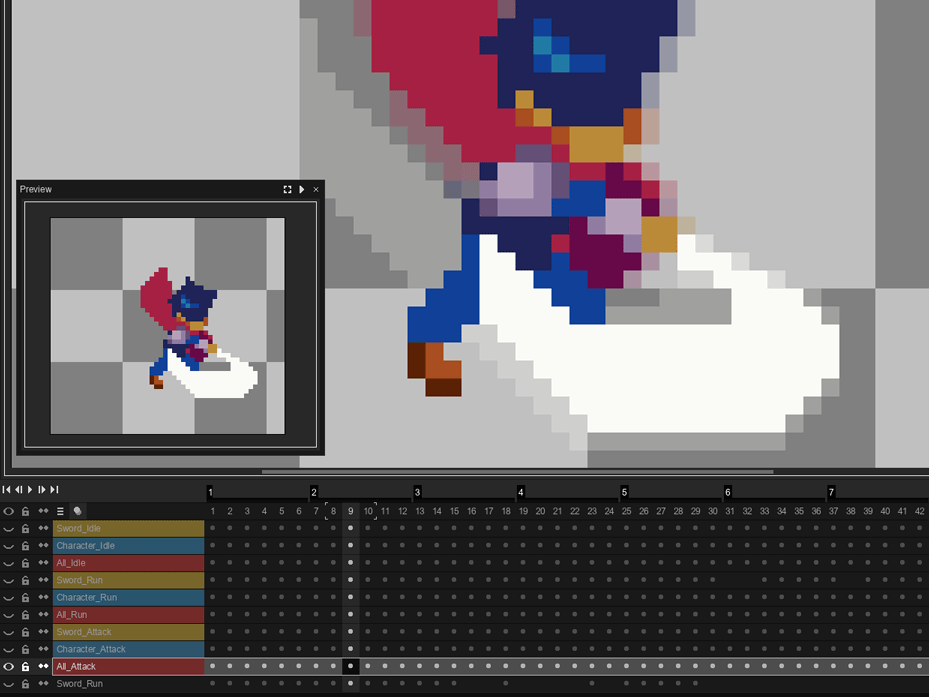
Natural talent provides a boost, but isn’t a necessity. Organization and the proper tool for the job goes a long way when fueled with a hard working spirit. For me, the practical animation functions in Aseprite greatly ease the struggle. The frame based timeline, which allows multiple layers is easy to use and stay organized with tags. Realtime playback/preview, and onion skin are also essentials. These features allow me to clearly see how my animation is looking, how one frame connects to the next, and experiment in real time to make incremental improvements.
I had become proficient with the frame animation in Photoshop over several years, yet, my workflow was improved from day one in Aseprite. I didn’t intend on making an advertisement. It’s not like I’m getting anything to promote the app, but it has genuinely improved my animation abilities, turning a dreaded process into a joy. I haven’t tried all the apps, so I’m sure there are others with similar features, that might even be better. Ultimately, the creative will determines the artist, and I always recommend to use whatever is accessible, and feels comfortable to you.
Concerning the animation work at hand, clarity of motion with minimal noise takes precedent over maintaining the details of every pixel in every frame. Any flickering pixels that draw the eye away from the overall motion I would describe as noise. These are often seen in the sub pixels, but can also appear in the outer form. Furthermore, there are instances where clusters come together and create noise that reduce readability of the motion. These are easiest to catch when repeatedly playing back the cycle at full speed. Even though the details are accurate to the static character design, they can get lost in the noise when put in motion. Therefore, reducing colors and simplifying the clusters may provide the fix.
Final Thoughts
Animating this character design in all 8 direction was more time consuming than I expected, and I was only able to deliver 2 new mini tutorials for this Pixelblog. Fortunately, they are quite dense, and will take plenty of time to fully digest. Animating the cape physics, hair bounce, and equipment on top of the base character movement accounts for its own chapter of the process. Especially if you are not caught up on parts 1 and 2, you have a solid journey ahead of you. Ultimately, I’m glad to have completed all the animations from the series for the complete blue haired warrior design, rounding out a nice set of assets to utilize for an 8 directional character controller. Finishing the trilogy feels like a good resting point for the series, but surely there is more to be done.
RESOURCES
Please consider supporting my work by becoming a Patron. Among many other rewards, Patrons can download the assets featured in my tutorials. But, most importantly, you allow me to continue making new content!
Many of my popular assets are also available to purchase from my digital shop
Alternatively, you can support me by making a one-time donation
Assets featured in this Pixelblog are available in Top Down Character Animation Part 3 Asset Pack
Source files used in the making of this Pixelblog are available in Top Down Character Animation Part 3 Source Files
Get caught up on all my downloads
You made it to the end of the article. Thank you for reading!
-By Raymond Schlitter


