Intro
In the simplest terms, any game that allows the player to run and shoot at the same time could be described as a run ‘n gun. However, such a broad generalization confuses the distinction of this hybrid genre, which is best defined by the gameplay. To explain, let’s compare two famous examples, Contra, and Ikari Warriors. In contrast, the former is a side scroller that involves platforming, while the latter is top down with no jumping. Moreover, the genre defining similarities are on foot characters in scrolling levels that urge the player to keep on the move, shooting enemies, and dodging various attacks. To get even more nitty gritty, I could include the distinction of auto versus manual scrolling, and how this muddles the genre terms, but I’m here to discuss pixel art, so I’ll nip my geekdom for precise gameplay vocabulary there.
For this feature, I’ve targeted the concept of a run ‘n gun in the vein of Contra. Hence the important distinction of ‘Side View’ in the title. Furthermore, we will cover a robust set of character animations that combine shooting with various types of movement, and a complete environment design to place our protagonists in. All this is done in a very economical small scale, and colored with the NES palette.
DUMMY Sprite
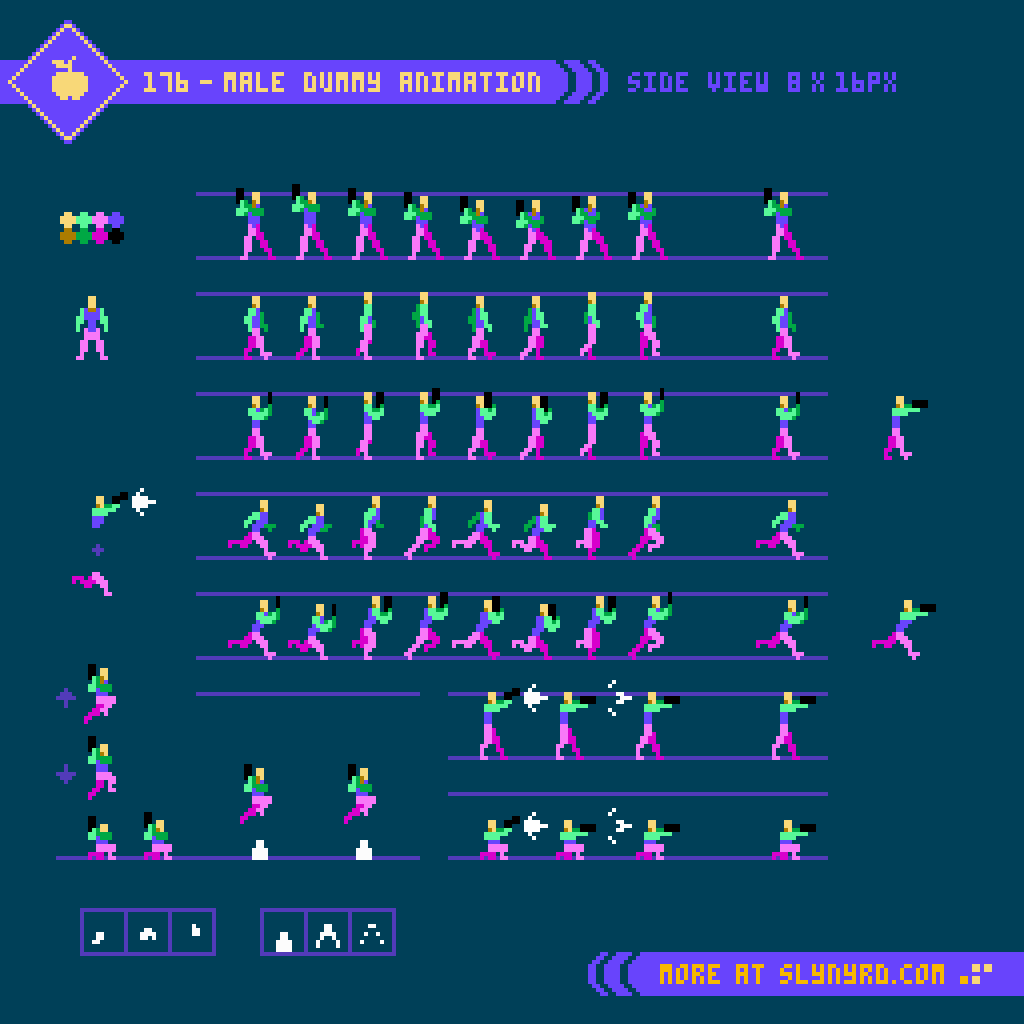
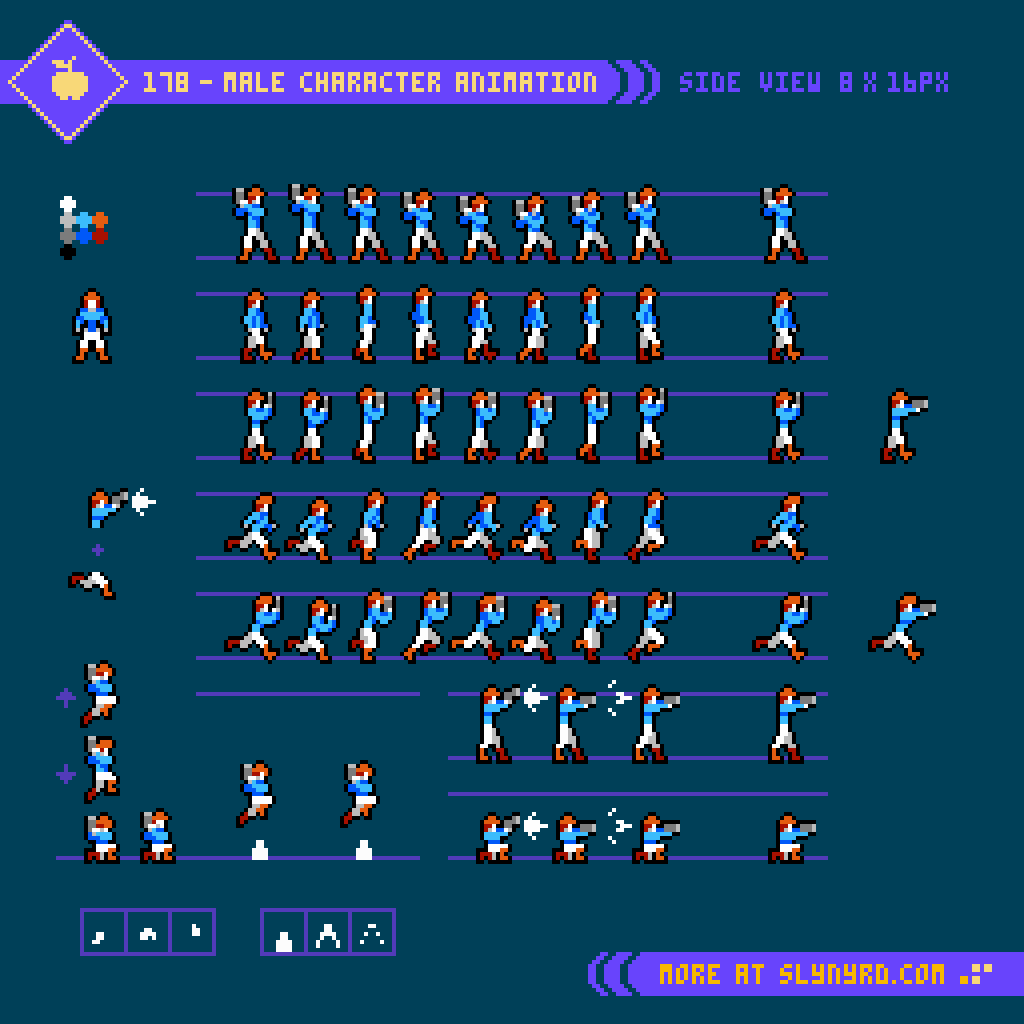
As standard, the animation starts with a simplified dummy model. After designing 8x8px characters, 8x16px feels like a gracious amount of space to portray surprisingly realistic anatomy. Well, 8x16 is the average base, but some poses slightly break those dimension. A good place to start is a basic front view to establish proportions, but in truth, I jumped right into the walk cycle. The walk and, or run cycle is foundational to a character sprite, as it establishes the expression, and standard of fluidity that should be carried across the other animation cycles.
WALK
For the walk, I went with a generous 8 frames. Depending on the character design, and desired playback speed, it’s possible to make a serviceable cycle with less frames. For example, chibi style characters with stubby limbs, and fast movement are more suitable for low frame cycles, but full length appendages usually require more frames to convey convincing movement. Sprite size also plays into the animation, as we discovered in the previous feature, there may not even be enough pixels to accommodate more than a few frames. Granted the size permits, 8 frames hits a sweet spot by capturing all core poses, contact, down, pass, and up, as established by traditional cartoonists, most famously in the Animator’s Survival Kit.
For this sequence I partly referred to the aforementioned ASK, but I didn’t want it quite as exaggerated and noodley, so I incorporated analysis of real life studies covered in Pixelblog 50. All that along with a dash of intuitive experimentation in the moment to capture a lively, confident swagger.
RUN
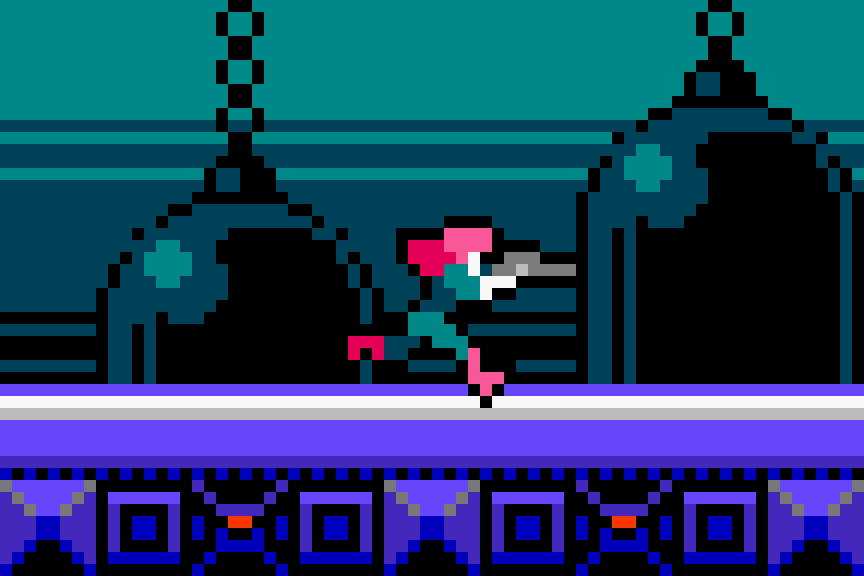
For the run cycle, I built off the walk model, leaned the head and torso forward, cranked up the stride, and increased the playback speed. The forward tilted gesture with head slightly down really helps sell it. Also, note the increased bounce motion and modified rhythm in comparison to the walk.
MOVE WITH GUN
After making the basic walk and run cycles, I created the gun toting versions. To do this, I simply removed the arms from each frame, and replaced them with arms holding a gun. Most of the work is already done, as shoulder position and bounce follows the same motion. The general manner of holding the gun, and its sway require a bit of imagination, but yield another layer of expression.
MOVE & SHOOT
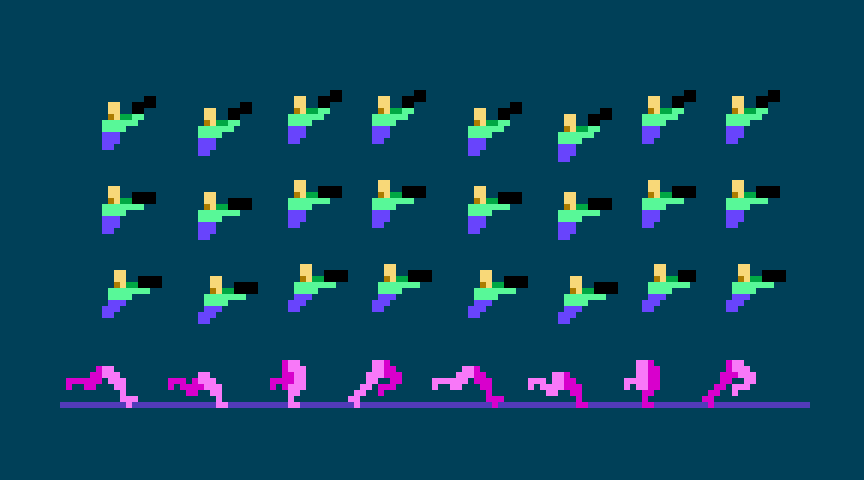
In order to allow shooting while moving, the legs and torso must be cut into separate layers. This allows the legs to continuously flow through the various animations irrespective to the action of the top half of the sprite. As you can see in the standing and crouching poses, the shooting animation includes 3 frames. Furthermore, an identical, or similar version of these 3 frames should be supplied and positioned for all frames of every animation that permits linear motion of the sprite (i.e. walk, run, and jump). Some frames share identical poses, but it’s still worth designating them for the sake of organization.
JUMP
For responsive control input, which is essential for run ‘n gun gameplay, it’s best to make the jump animation simple. At minimum it only requires 1 frame, usually a pose with the limbs tucked in (almost like crouching in the air) translates well into jumping motion. In my Castlevania Study I learned the jump and the crouch are literally the same pose. While that’s a clever use of economy, adding just one more pose takes things to the next level. Moreover, I create an ‘up’ pose for when the character is ascending, and a ‘down’ pose for when the character is descending. Not only does this give the motion more life, but the visual cue when you reach the apex can help with timing your jumps.
You might expect there to be some kind of anticipation where the character bends their knees before launching. Sure, that make sense in a stand alone study of jumping, or a cinematic platformer, but in the context of most games, you don’t want the input delay that would add. Since the staging concept of this feature is a run ‘n gun, the jump occurs instantly.
LANDING
While I prefer my jumps to have instant response, I respect a game that requires some commitment to jumping, such as limited, or no ability to correct the trajectory once airborne. Also, there may be a slight delay upon landing. Furthermore, I’ve included a subtle landing pose that recycles the crouch pose, and adds one slight iteration with the head and arms slightly dipped down on the first frame upon landing. While this helps sell the feeling of gravity, it could be reduced, or omitted if you want no loss of momentum when jumping. For example, you could have one pose with the knees slightly bent that only shows for a split second when landing, but sprite movement is not stopped. Another solution is to combine these ideas into a dynamic system, so the land delay only occurs if falling a certain distance.
PLAYBACK SPEED
The duration each frame is shown through an animation. Here’s the run down on my examples in milliseconds.
Idle, Walk - 120
Run, Shoot, Land, Dust effects - 60
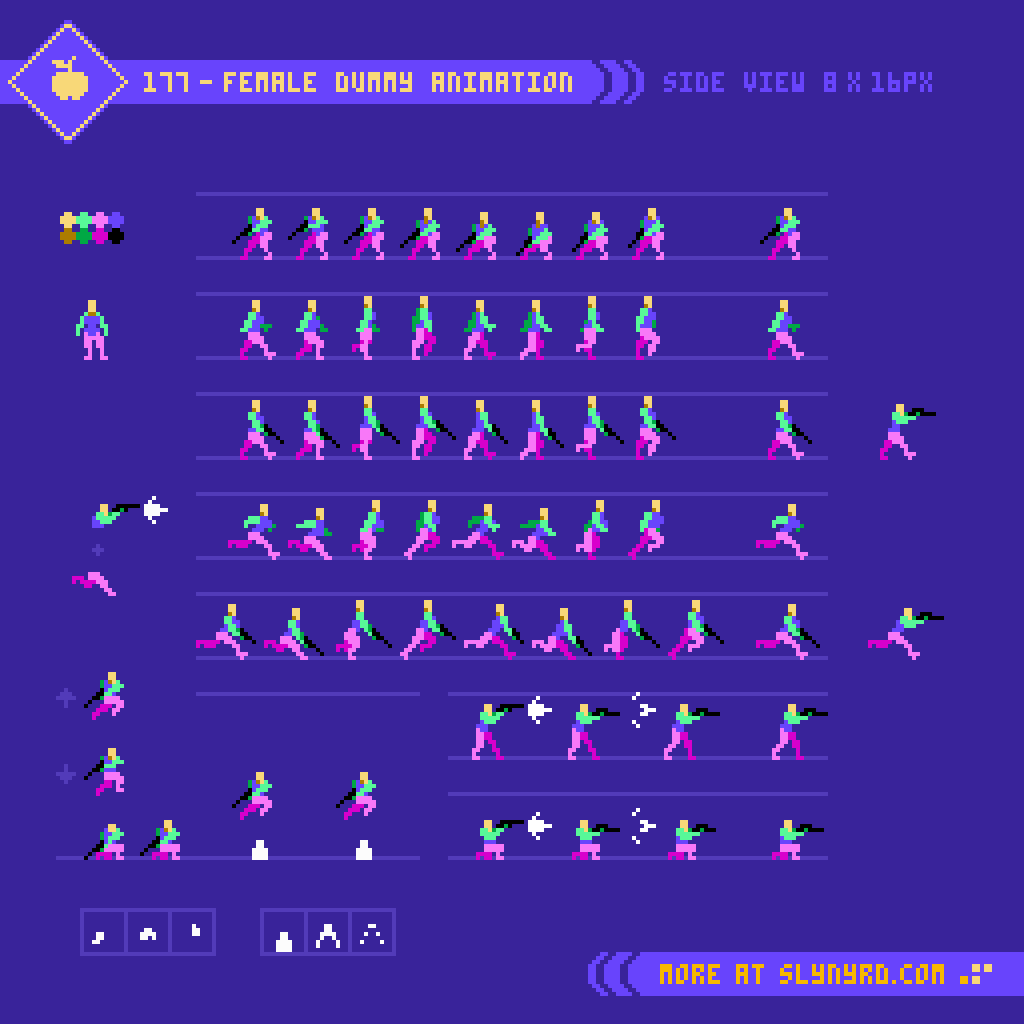
Following the same model as the male, the female illustrates only subtle differences in the basic anatomy, but captures more distinction in the expression of the animation. The female physique relies on lower, and core strength to manage the weight of the long barrel gun. Moreover, she holds the weapon downward from her center, when not shooting. Also note the swing of arms and legs is more playful with a slight more grace of movement than the male counterpart. Otherwise, the timing, and set of moves follows the same model.
Character Sprite
After establishing the dummy model, creating a complete character design is mostly a practice of painting by number, however, loose fabric, bulky fashions, and hair require an extra layer of thought. For my male character design, the only thing that doesn’t conform within the dummy model is the hair, which has subtle movement to enhance the run, and jump animations.
I’m usually not a fan of straight up black outlines, but it works well with the background design presented below. Also, the heavy contrast suits the stark colors of the NES palette.
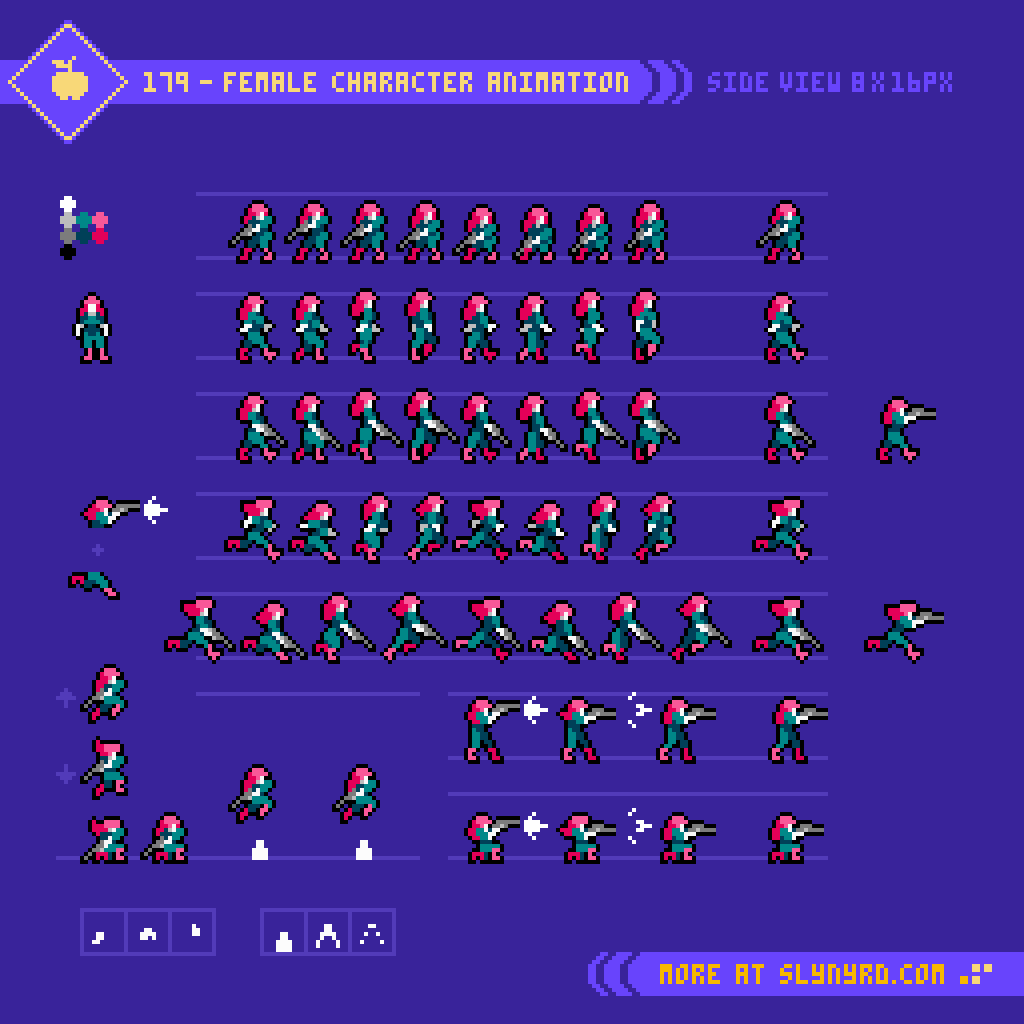
The female character design also closely conforms to the dummy, but has long hair, and the clothing slightly puffs up the shoulders in some poses. As with the male, the hair animates along with the run, and jump, but with slightly more involved movement to accommodate the fuller length. Additionally, it felt appropriate to add some movement to the hair during the shooting action. This hair movement applies to all shooting combinations, except for when running. I felt the rhythmic bounce of the hair while running should override the shooting hair flip, as it provides a nice lively rhythm with less noise. As for shooting while jumping, I tinkered a couple pixels so it feels neutral for both up and down states. If the level design permits prolonged moments of falling, I might make distinct shoot frames for the falling state, but otherwise there would rarely be more than a split second to shoot while falling.
Background Design
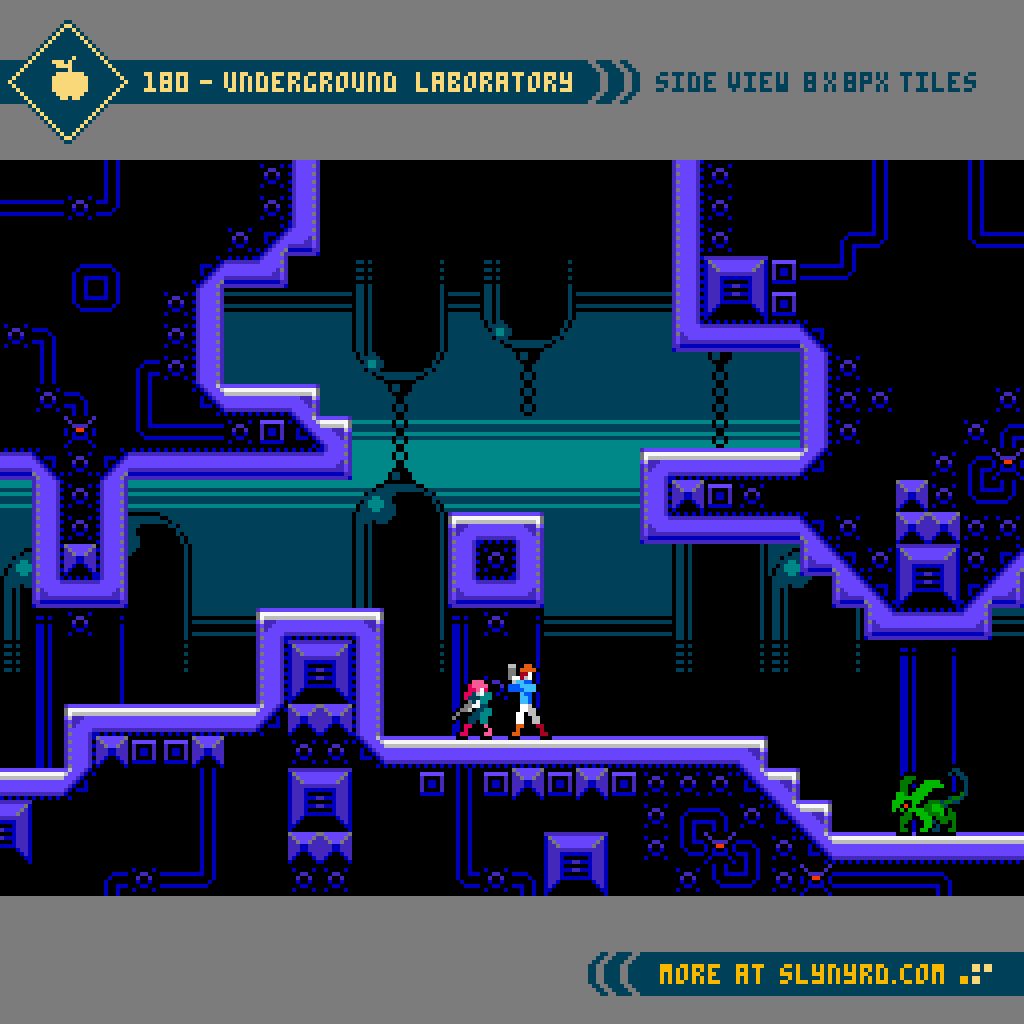
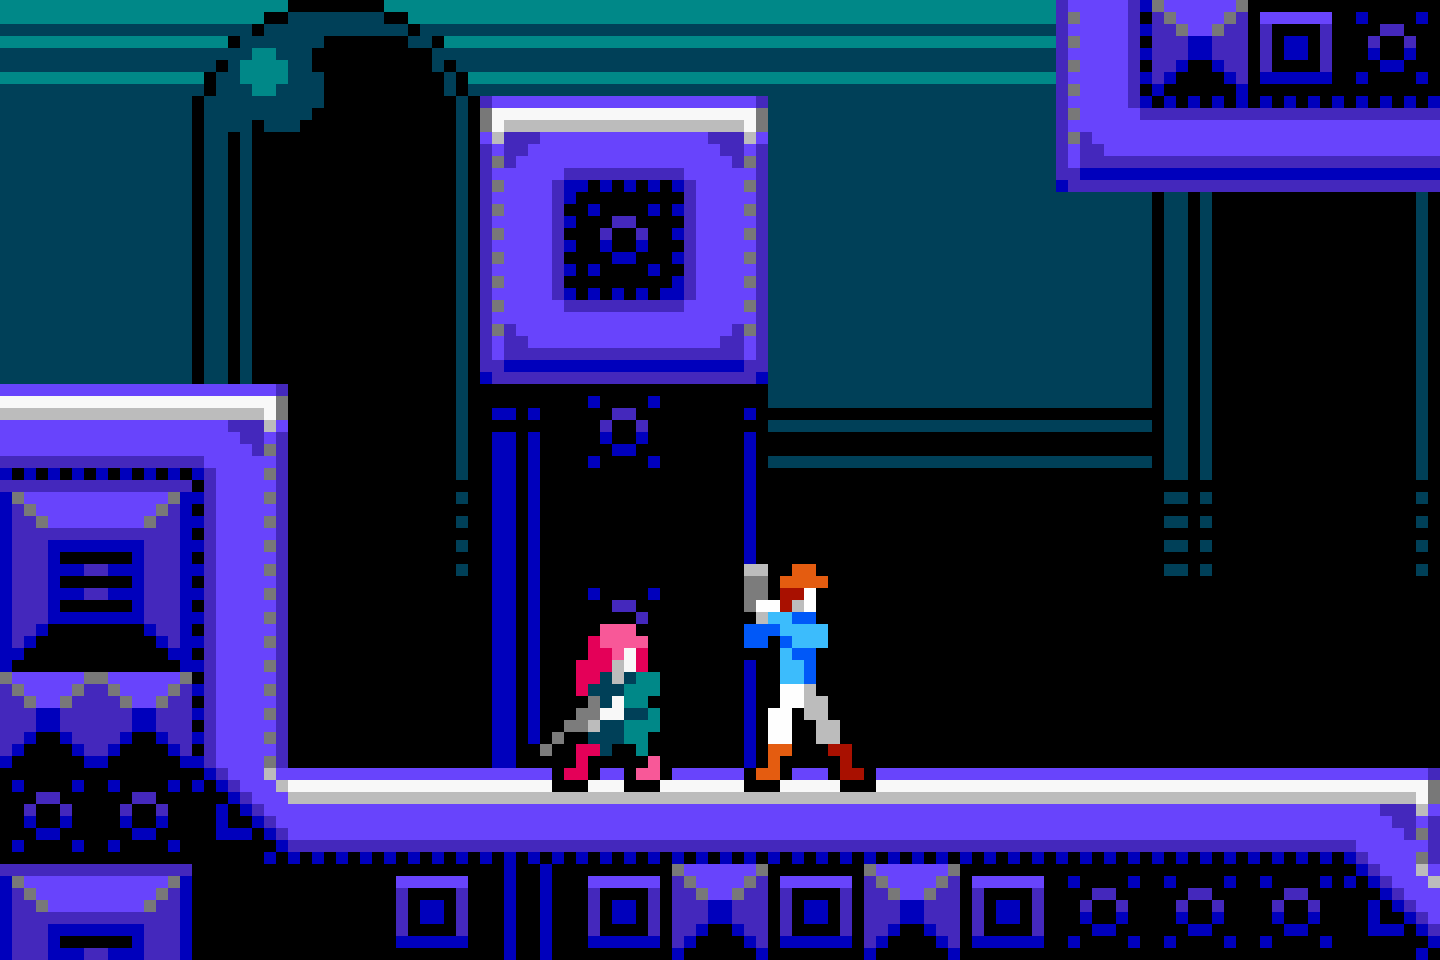
After all that hard work animating, I consider tile design a relaxing cool down. The tiles are 8x8px and my target resolution for the game mock up is 320x180px. This size is 16:9 ratio, and scales pixel perfect into full HD. Furthermore, the relative size of the characters, and tiles on the screen at this resolution strikes a fine balance for both aesthetics, and gameplay.
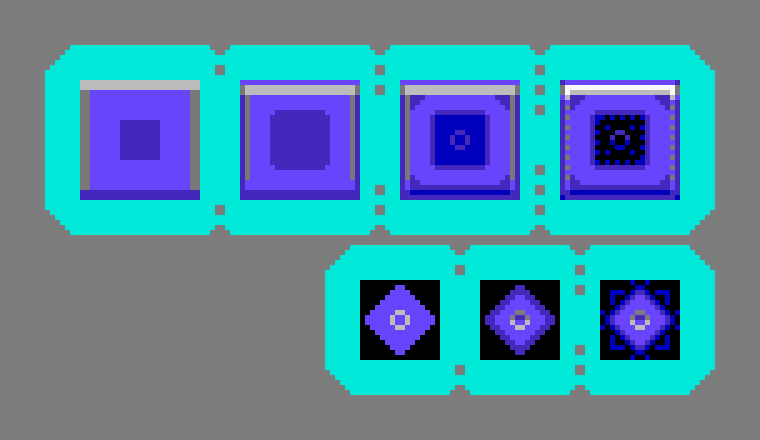
The first two rows of the step by step process section of the tutorial shows the core tiles needed to make the interactive layer of a stage. The 3x3 tile structure shown first is most fundamental, as it provides floors, ceilings, and walls. Secondly, the 4x4 tile diamond shaped structure provides the inner corner pieces that are need to connect ‘L’ shaped formations. With these 12 tiles you can create all manner of level design, sans angled slopes.
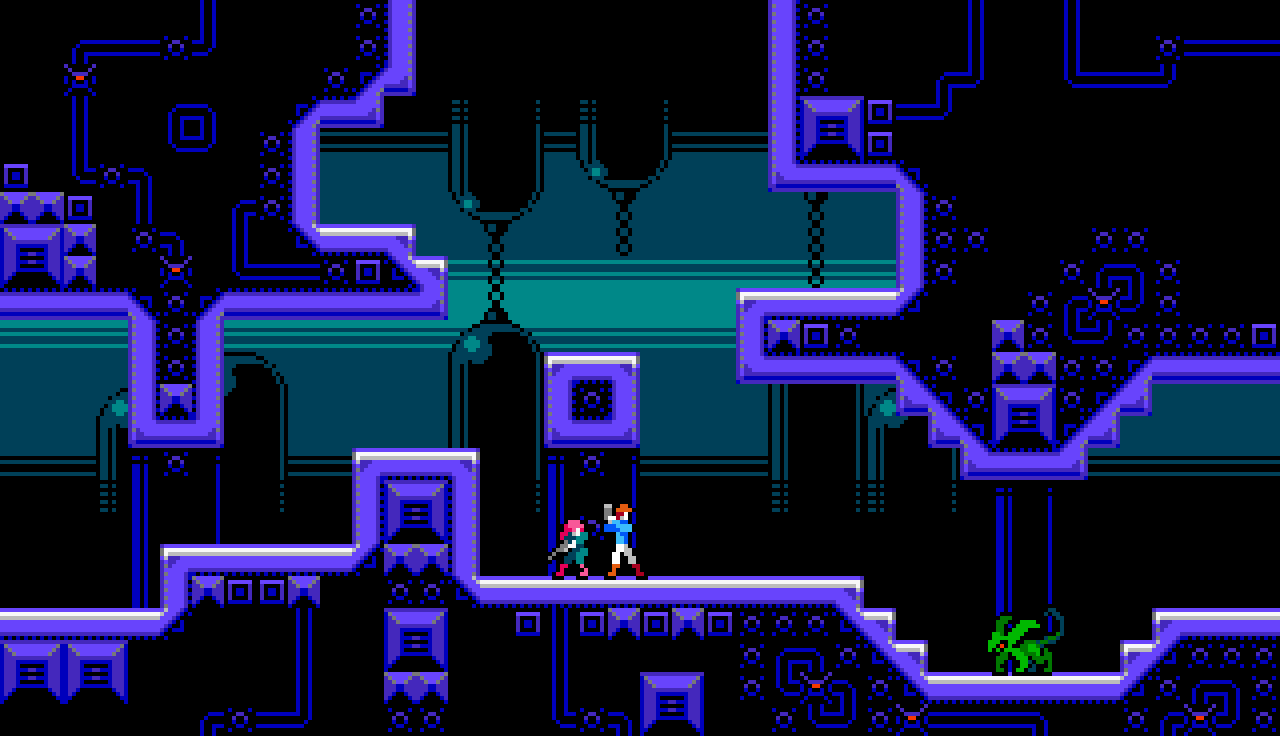
Full screen 16:9 mockup, native resolution 320×180px
I’ve worked with 16x16px tiles in side view several times, but this was my first time using 8x8px. The smaller size is much easier to work with, and the visual quality holds up surprisingly well. Capturing depth with the background while maintaining clear visual separation of the layers and objects is the key challenge of side view environmental tile design. Due to this, I find top down tile design more approachable. However, the economy of 8x8px units, and the strange harmony of the NES palette seems to have mitigated much of the difficulty. I can’t discredit my experience, and skill crossover from other areas of study, but things just clicked in a way that makes me much more confident to approach side view level design in future projects.
Final Thoughts
Guess I was having fun. This one quickly spilled into a prolific stream of content. Yet, there’s still more left in the tank. While I covered the basic animation concept to combine shooting with various movements, multidirectional shooting is missing. More complex moves like roll, dash, wall jump, and ledge climbing would also be nice. Fleshing out the world with enemies, and more environments is always exciting too. If you enjoyed it as much as I did, you might be seeing more.
Resources
Please consider supporting my work by becoming a Patron. Among many other rewards, Patrons can download the assets featured in my tutorials, and use them for commercial projects. But, most importantly, you allow me to continue making new content!
Many of my popular assets are also available to purchase from my digital shop
Alternatively, you can support me by making a one-time donation
Assets featured in this Pixelblog are available for commercial use in Side View Run ‘N Gun Asset Pack
Source files used in the making of this Pixelblog are available in Side View Run ‘N Gun Source Files
Get caught up on all my downloads
You made it to the end of the article. Thank you for reading!
-By Raymond Schlitter