intro
Long before the polygon, game creators have sought to bring 3D worlds to life by whatever means necessary. When the only means is pixel art, one must rely upon the good ol’ art of illusion. I have always felt the illusion of 2D art, as in traditional painting, or pixel art, is more compelling than realized 3D in the form of sculpture, or modern 3D graphics. The lack of information in the 2D form kicks on the viewer’s imagination to fill in the gaps, while true 3D spoils this interaction by giving you the full 360 degree view. Furthermore, I present a lesson of 3D concepts achieved by hand pixelled frame animation. Sure, it may not seem like a practical approach in the modern setting, but the mental exercise is greatly satisfying, and the results are guaranteed to be unique.
3D Dungeon
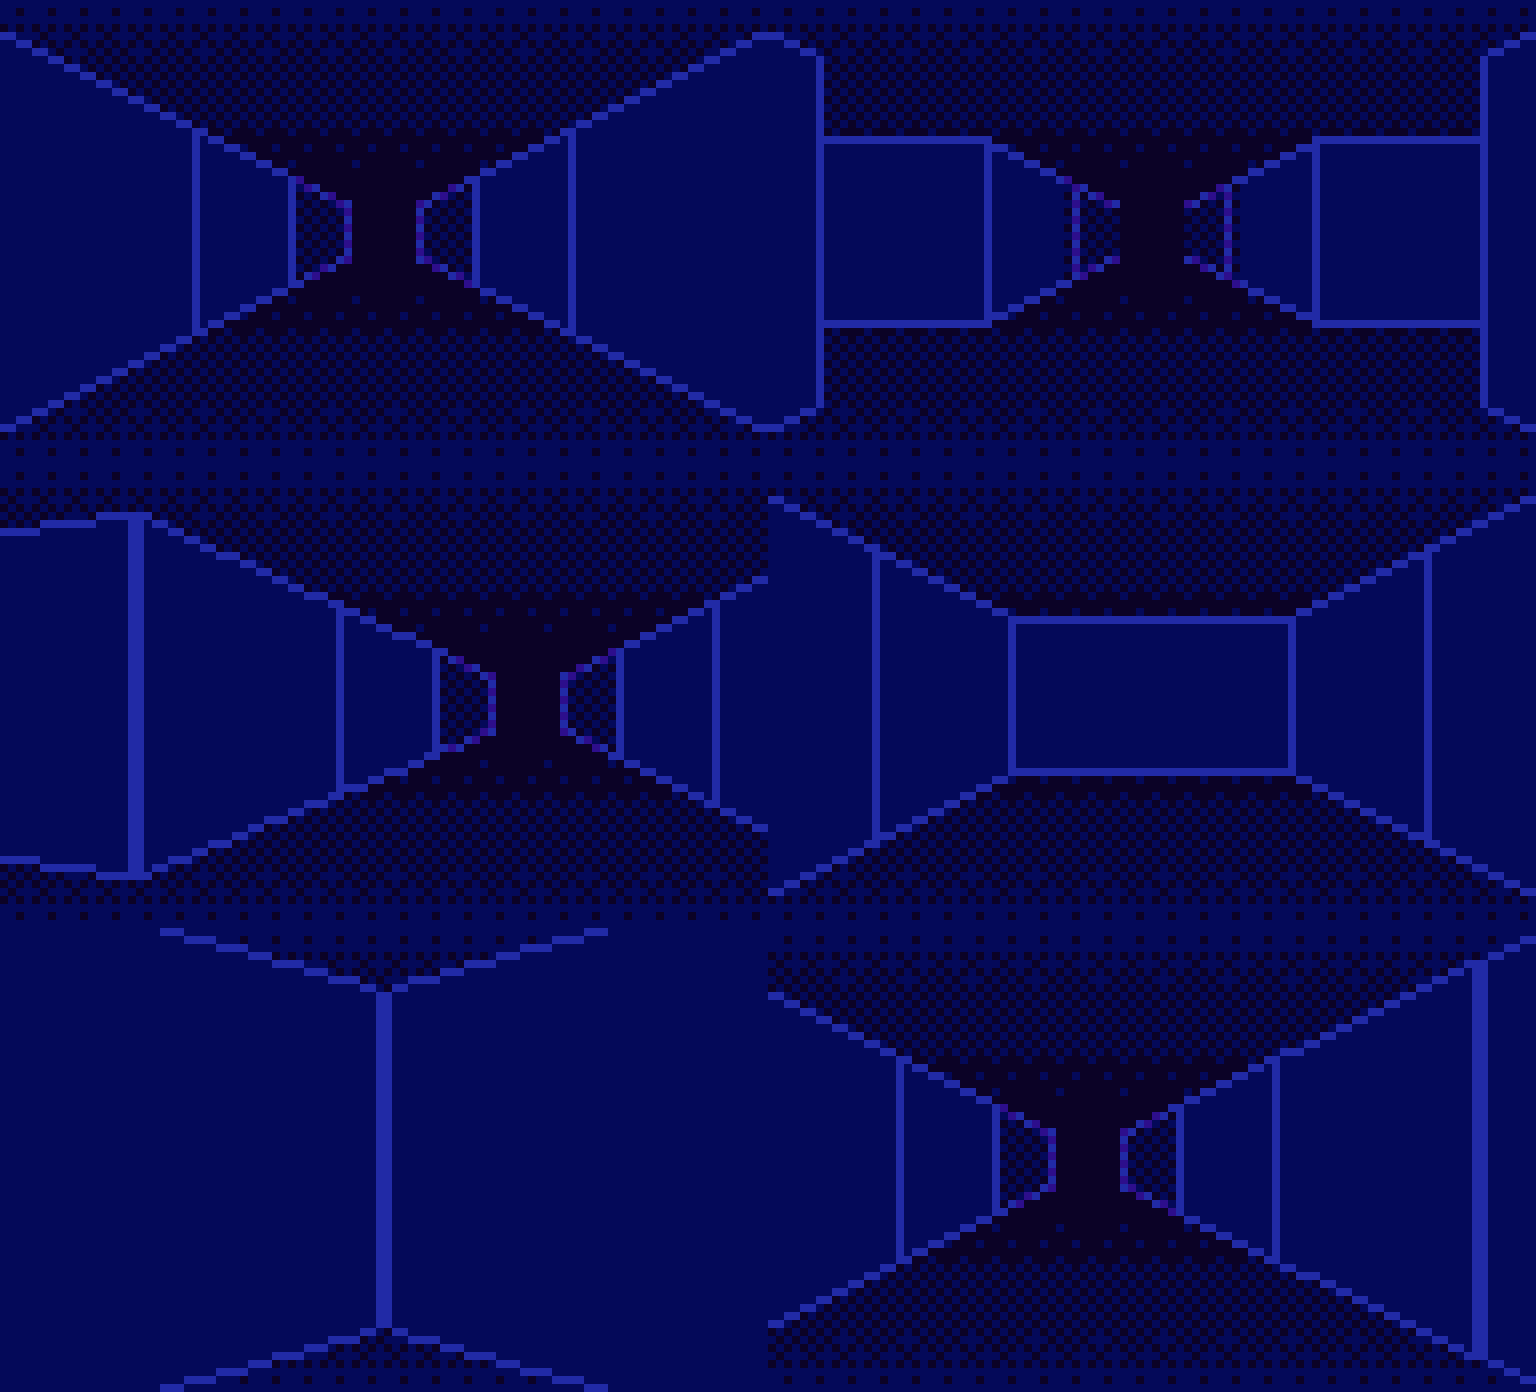
Before Doom came along with its revolutionary 3D engine, the first person perspective was uncommon in games, generally reserved for dungeon crawlers, and archaic flight sims. In the case of the former, simple corridors are navigated within a tile based system, presented in slideshow fashion with little to no animation frames between tiles. This lack of animation could be disorientating and limits the immersion factor, However, a valiant effort can be seen in the example of Phantasy Star 1 for the Master System, which actually animated first person movement between steps and turns within simple 3D corridors. Taking inspiration from this prime example, I’ve created a first person dungeon concept with basic forward, backward movement, and turning.
I recommend using a low resolution to economically practice the concept. However, keep in mind the less pixels to go around, the less nuanced movement can be, as even a single pixel movement can appear dramatic on a small scale. My example is 96x58px, landscape format to capture a natural wide gaze.
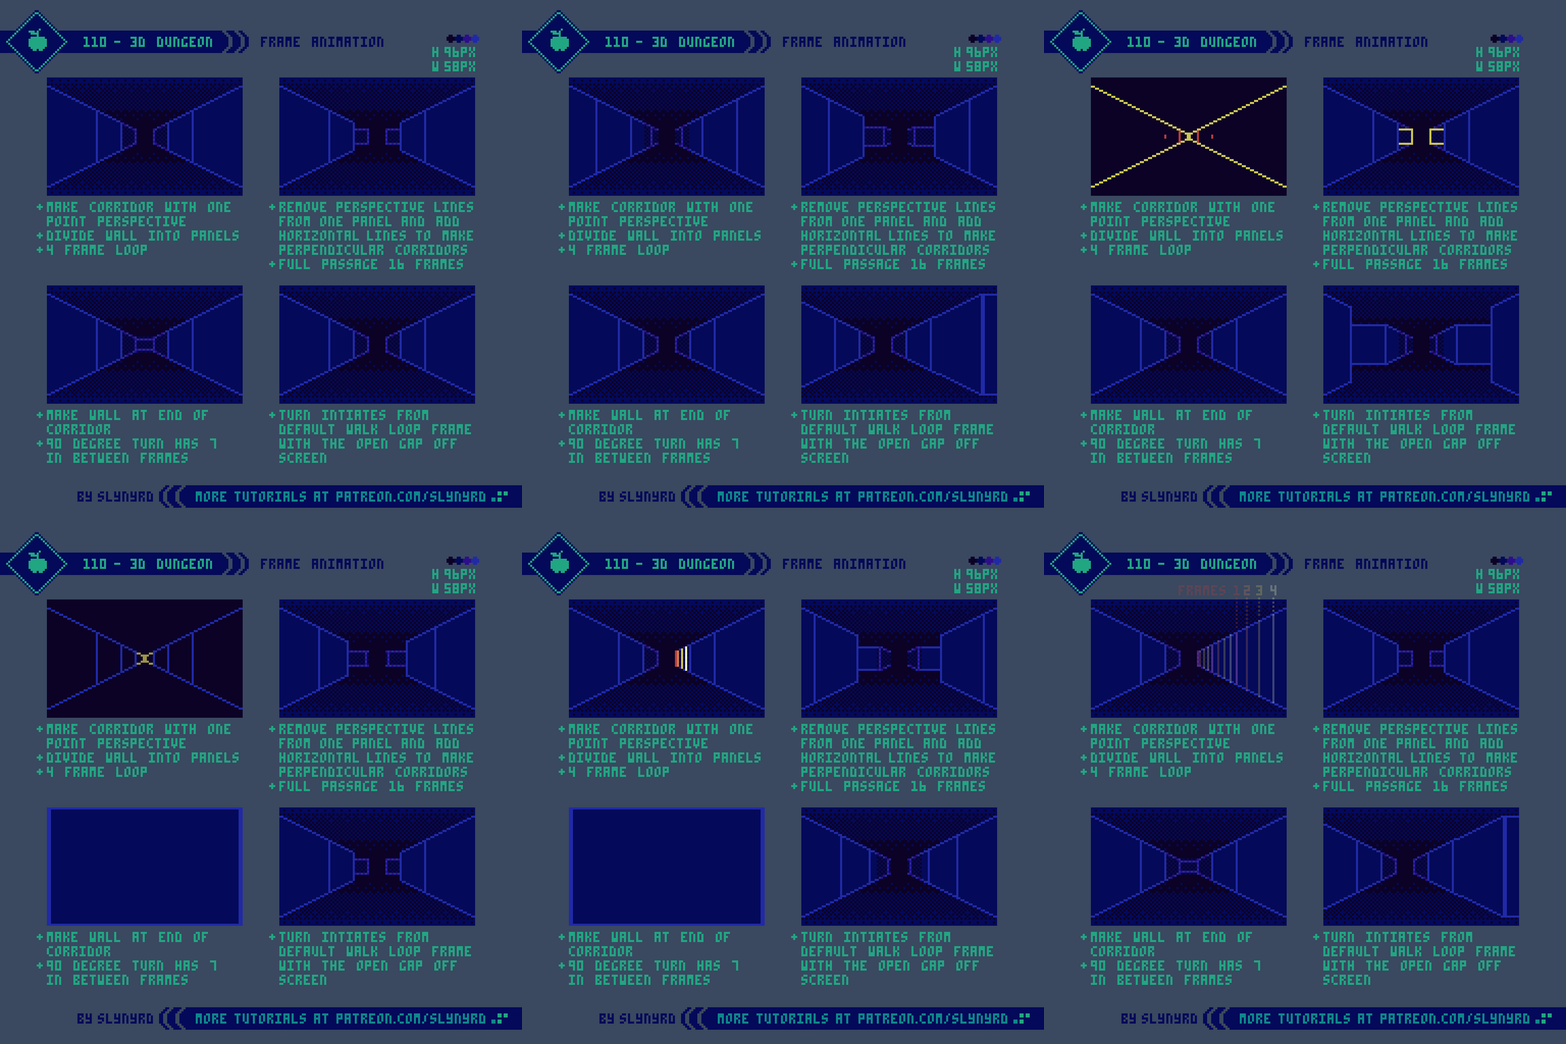
Make a simple corridor with one point perspective, and the vanishing point at the center of the canvas. Use only lines and solid color to make the walls. Divide the wall into panels with vertical lines. The gaps between lines should grow larger as they extend out from the vanishing point. Make it so the nearest panel is uncropped and flush to the canvas edges. Apply a dithered texture with darker color to the far end of the walls at the center of the canvas to create a subtle atmospheric depth effect. Also, apply dithered gradient to the background with darker color in the center to enhance the sense of depth.
To create a straight movement loop only the vertical lines on the walls need to move until reaching the next line, or edge of canvas. My example only uses 4 frames for this core loop. Make sure the dithered depth texture is applied consistently to all frames.
To make perpendicular corridors, simply remove the perspective lines from one wall panel and replace them with horizontal lines. Start from the most distant panel and do this for each frame until the side corridor has passed the field of vision, back to the first default frame from the core walk loop. My example is 16 frames for the full pass. I duplicated the 4 frame walk loop 4 times and modified each frame to have the side corridors.
To make dead ends, again duplicate the walk loop 4 times to make 16 frames. Starting from the first frame, make a wall at the far end of the corridor. Then make it one step closer each frame until the wall completely frames the canvas.
There are 7 frames of animation in between end points of a 90 degree turn. First, establish the middle frame of the turn as a key frame. This is the frame where you are turned 45 degrees exactly facing a corner. Depending on if you are turning into a corridor, or turning from a dead end, the middle turn frame will respectively be a convex, or concave corner. Once you’ve established the middle key frame, you just need to come up with 3 frames between it and the start point, which can be duplicated and reflected to complete the second half of the turn. This step requires keen vision to imagine how the environment rotates. I referenced the animation from Phantasy Star 1 to help see how the angles trend from frame to frame.
Once you’ve mastered the simple vector style dungeon, try including brick texture, and environment variations, like windows, cobwebs, and bones. Just remember every detail needs to be hand drawn into dozens of frames. Yikes!
3D Hyperspace
I’ll permit a break from the lesson if you’re stopping off for a little game of Hyper Echelon
How does one travel the big wide universe? Hyperspace, of course. Essentially the interstellar highway, this sci-fi concept is commonly used as a mechanic to feasibly link many worlds in one epic story. Sure, we know it from Star Wars, but did y’all catch Hyper Echelon?
Yup, I have some experience with this kind of animation from multiple scenes created for Hyper Echelon. Here, I’ve refined the core elements into a sample animation while breaking down the process from start to finish.
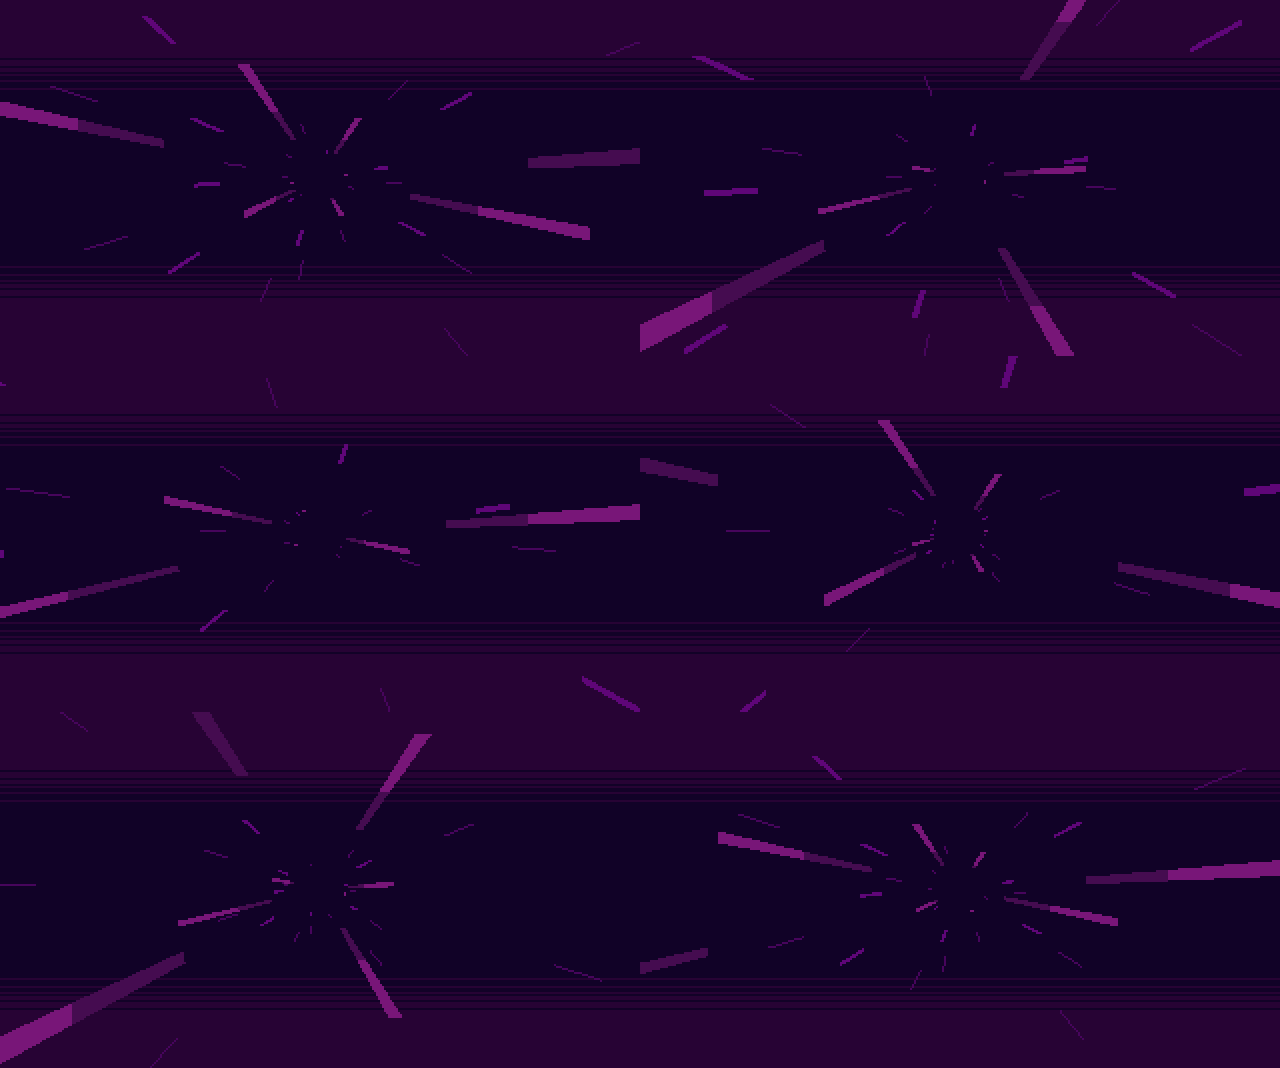
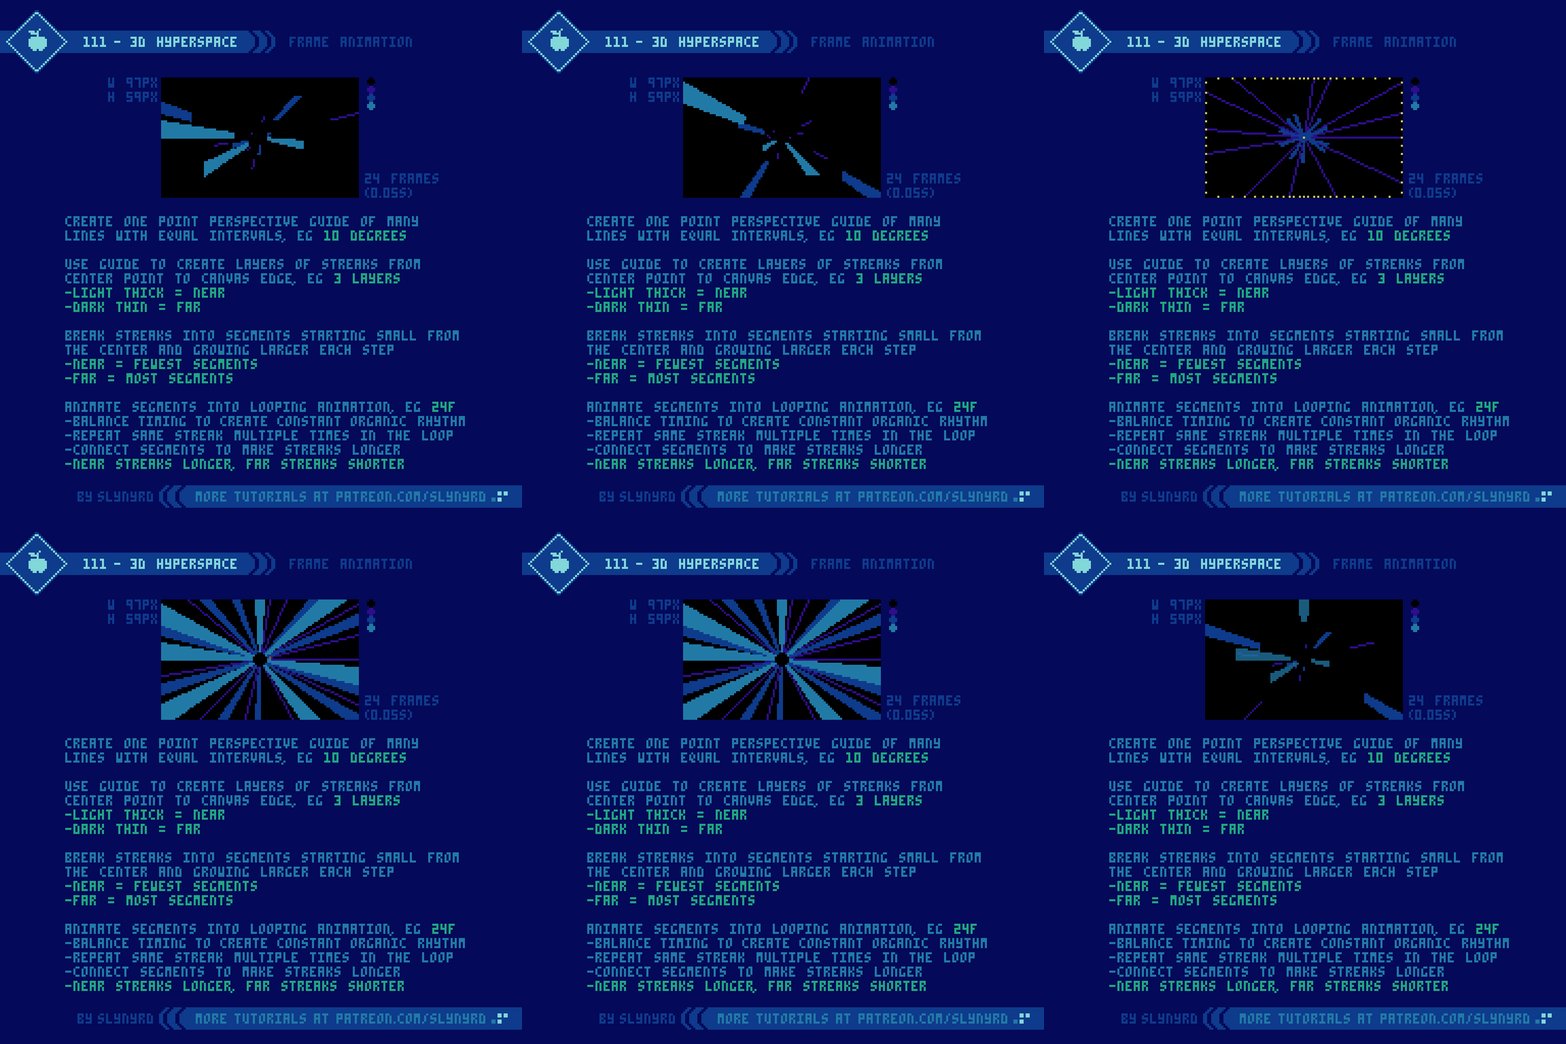
First, make a one point perspective guide of many equally space lines from a center vanishing point (10 degrees in my example). Use this guide to create multiple layers of streaks with varying thickness and color to indicate depth of field. Thin dark streaks appear farther away while thick bright streaks appear closer.
Once the composition is filled with full length streaks, break them down into segments. To capture depth, the segments should start small near the center and grow longer each step outward. Avoid cropping and always make the nearest segment the longest segment of the streak.
Animate the segments into a looping animation (24 frames in my example). Coordinate position and timing of streaks to create constant balanced rhythm that feels organic, opposed to obvious intervals of waves of stars. Streaks can be repeated multiple times through the loop to achieve this constant flow. Segments can be connected to make streaks longer. In my example, far layer streaks are only one segment long, 2 segments long in the middle layer, and 3 segments long for the nearest layer streaks.
For an enhanced hyperspace, go for higher resolution, more frames, more depth layers, width variation within layers, and perhaps even a spaceship cockpit in the foreground. Have fun!
Rotating Cube
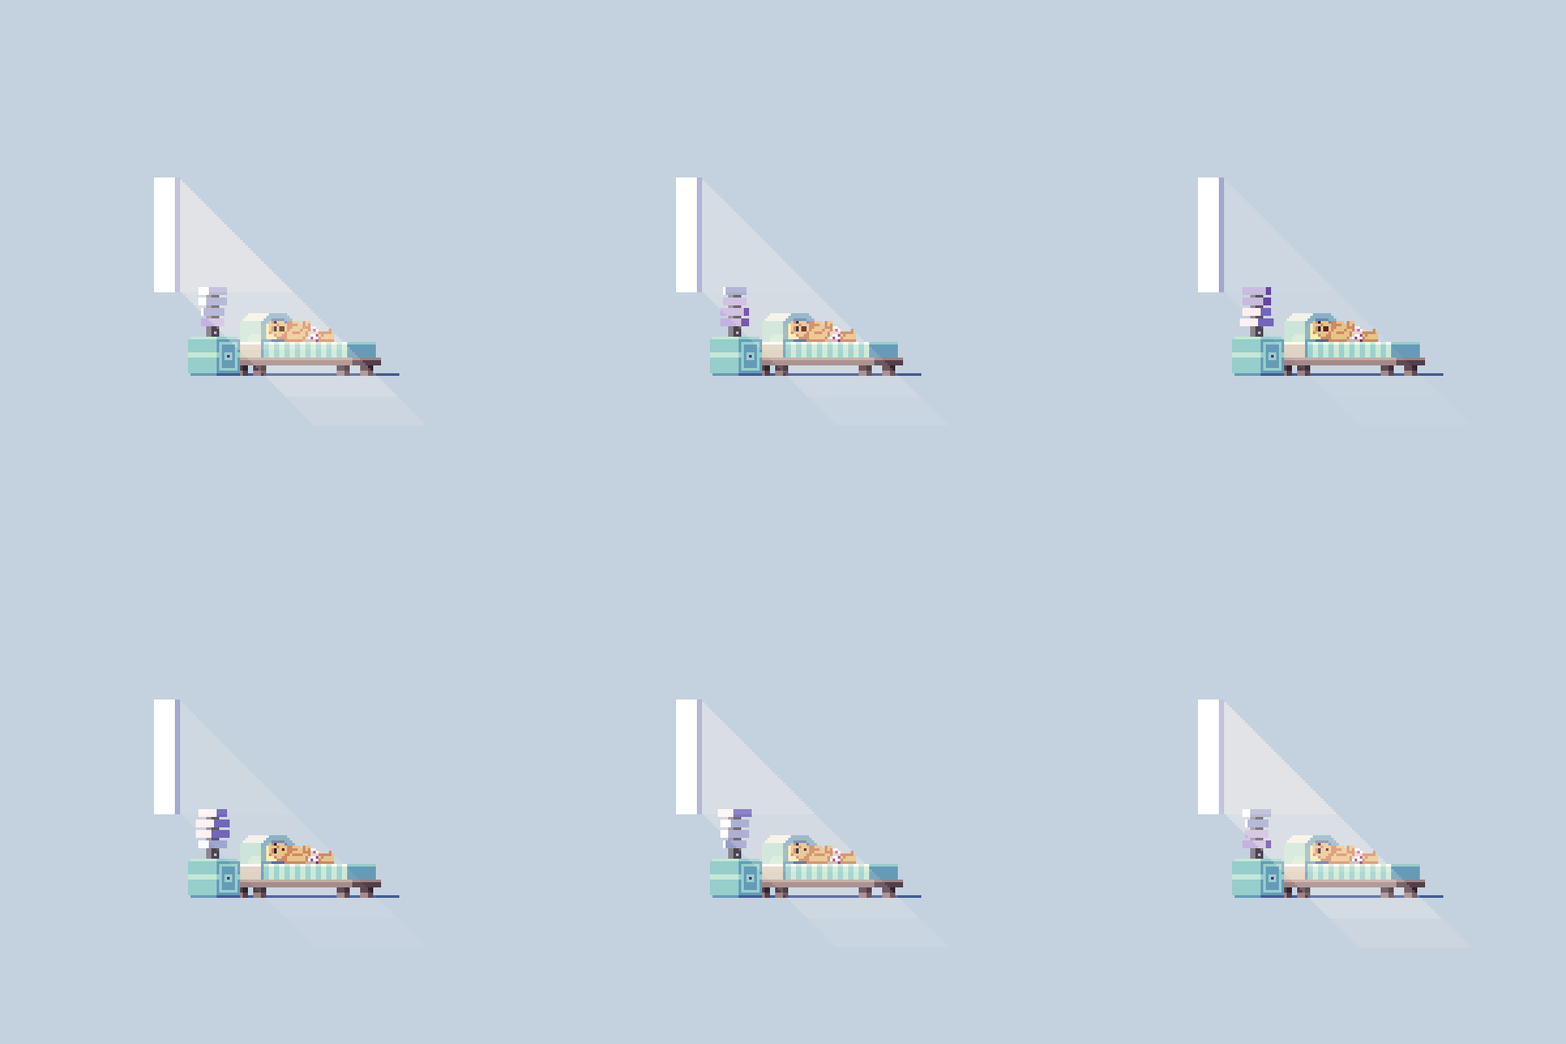
Next up, we have sort of a faux 3D effect, famously used as a level design mechanic in the game Fez, where the vanishing lines always remain perfectly horizontal. This abstracted projection is a cornerstone present in most of my work, but this strangely convincing animation is a bit of an oddity. I first conceived it way back around 2016 when working on a platformer prototype. Driven by curiosity, I tried to hand animate the rotation of my beloved ‘Fez’ cube. Surprisingly satisfied with the results, I applied the effect to some funky lamps that could be found in the home’s of NPCs.
But, let’s not get ahead of ourselves. First, we must learn how to create the illusion of rotation.
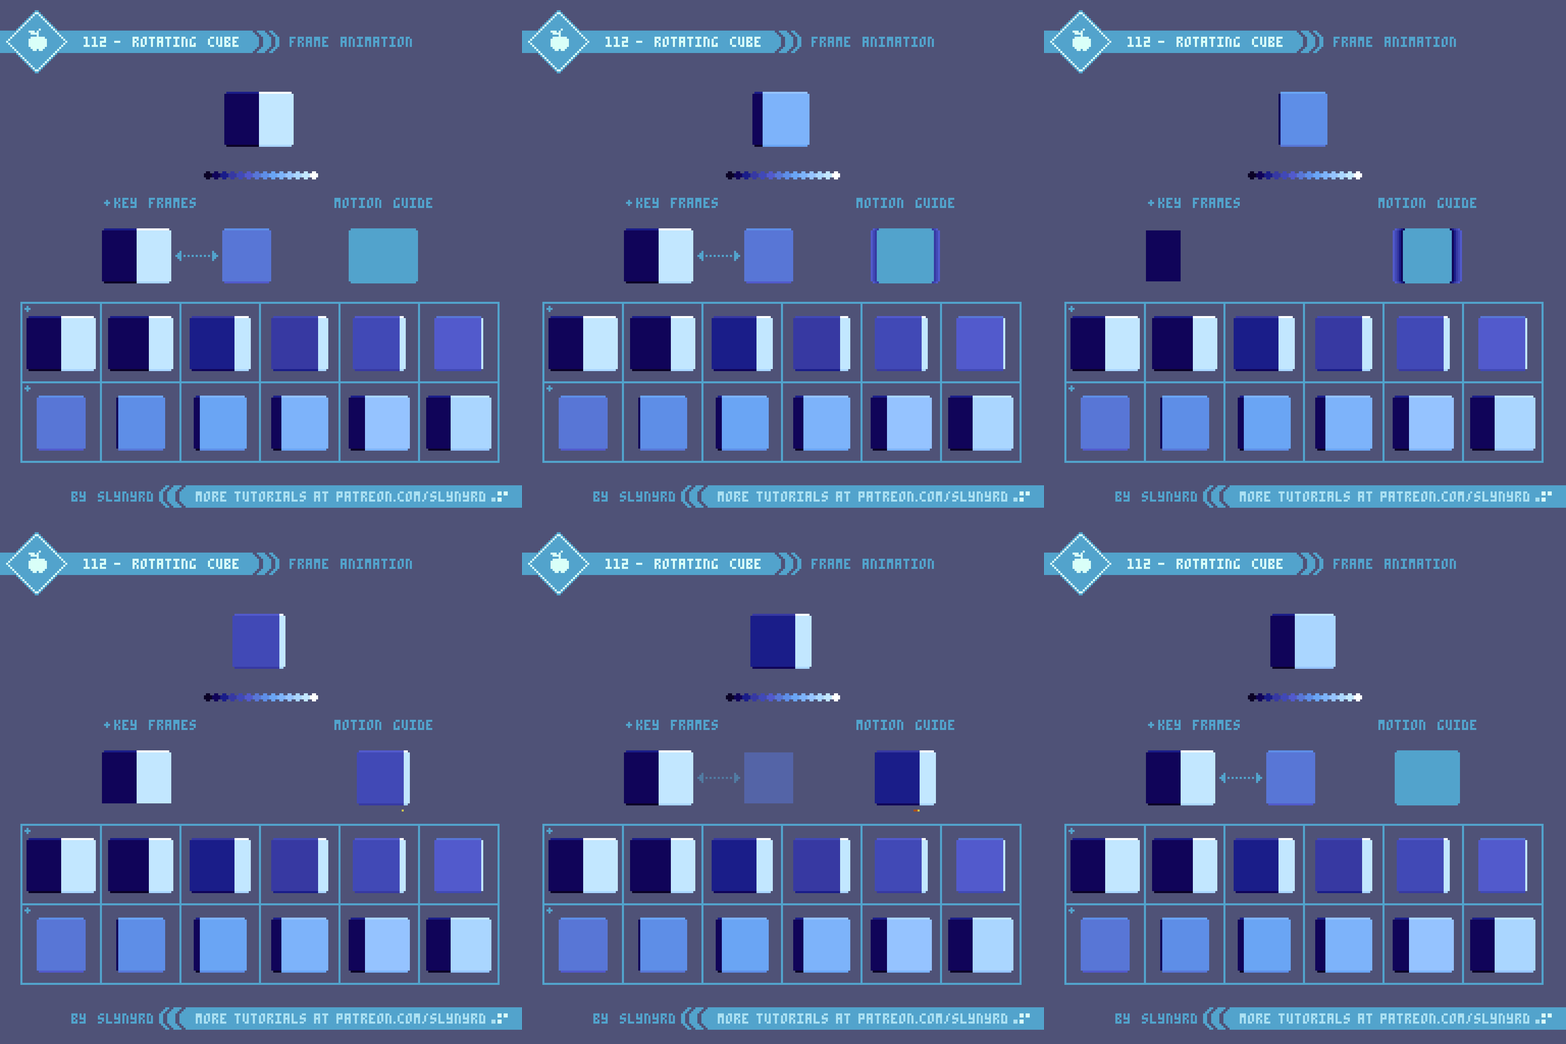
The overall motion plays a factor, but it’s mostly the color that sells the illusion. Therefore, the first step is to prepare a color ramp from the darkest hue to the lightest hue, with plenty swatches to fill out the gradient.
Next, make the key frames. One with the cube turned 45 degrees, and the other with the face of the cube flush to the viewer. Now, the tricky part is making the in between frames. Personally, I like to work in solid color from the get go, so I go one step at a time, considering shape, and color based on light source. However, if you’re a fan of outlines you could try nailing the shape and motion down before messing with color.
If you break down the motion of the shape itself, you can see even expansion and contraction with consistent 1 pixel movements. However, the movement of the perceived corner of the cube makes small movements at the sides of the mass, which become larger as the corner reaches the center of the mass. This should create a nice ease in, ease out motion of the corner sweeping across the cube, and create a sense of depth from the varied speed.
Try using less frames and removing the bevel from the cube for an easier version.
FINAL THOUGHTS
I needed to do something a little more unique after all the game studies lately, and this proved to be even more fun than I expected. Basing an entire game on a 3D pixel art concept may not be practical, but there are many instances in games where a little clever 3D can bring a splash of life to a 2D world. Some relevant examples are rotating sprites, a brief first person section, and or cinematic cutscenes that present a dynamic viewpoint. Pixel art may not be the first choice for 3D graphics. However, by keeping things fairly low res, the pixels have proven to be an economic way to practice 3D concepts. What’s more, I find these visual practices tickle my brain in a satisfying way, keeping the art muscles in shape, and boosting mental health. Give it a try!
RESOURCES
Please consider supporting my work by becoming a Patron. Among many other rewards, Patrons can access resources to compliment my tutorials. But most importantly, you allow me to continue making new content!
Alternatively, you can support me by making a one-time donation
Assets featured in this Pixelblog are available in 3D Animation Asset Pack
Source files used in the making of this Pixelblog are available in 3D Animation Source Files
Get caught up on all my downloads
You made it to the end of the article. Thank you for reading!
-By Raymond Schlitter
